April is just crazy in Connecticut. We had a week of 80 degree weather last week. Then what happens? A cold spell of course! We had near freezing temperatures last night and are on a frost warning tonight...This is why I generally hold off planting until May.
Thanks to everyone who has e-mailed ideas and advice. I have heard from a couple of people that if I don't plant soon, I may not get a crop the first year. For that reason, the rhizomes will be in my garden bed this week. Hopefully the weather will cooperate. Check back for pictures!
Hopefully everyone listened to the Home Brewing Perspectives Podcast. If you haven't, I think it is definitely worth a listen...check it out! Irrigation info soon to follow!
Tuesday, April 29, 2008
Wednesday, April 23, 2008
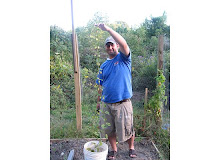
Dirt is Ready!
Nothing too exciting to report, but I have finished "amending" my soil. I added Agway Garden Soil and some Composted Cow Manure. With that done, I am finally ready to build my mounds and plant my rhizomes. I realize I had them for a while, but my chief concern was waiting until I was out of the danger of a frost. If you happen to get a freak frost after you have planted, below are some tactics you can use to help your rhizomes (or any plant for that matter) survive. These tips were taken from: http://www.thegardenhelper.com/frost.html
Irrigation information is coming, as well as pictures of my hops bed...check back soon!
When the inevitable occurs and a frost is predicted, there are several things which you can do to protect your plants.
If your efforts were too late, or too little to protect your plants from a frost resist the urge to cut off the damaged parts of the plants. To a certain extent, these dead leaves and stems will provide limited insulation from further frost damage. You will have to go back and re prune your plants in spring anyway.
Irrigation information is coming, as well as pictures of my hops bed...check back soon!
- Water the garden thoroughly before nightfall. The soil will release moisture into the air around your plants during the night, keep the air somewhat warmer.
- Even a slight breeze will prevent cold air from settling near the ground during the night. You can help keep frost from forming by providing this breeze artificially with an electric fan. Be sure to protect the fan and all electrical connections from water and the elements.
- Cover up before dusk! By the time it gets dark much of the stored heat in the garden has already been lost. If you have time, build a simple frame around the plant, or row of plants. (Even a single stake can be used in many cases.) Then drape a cover of newspaper, cardboard, plastic tarps, bed sheeting or any other lightweight material over the frame to create a tent. If you don't have time to create a frame, lay the protective cover directly onto the plant. This will help to slow the loss of heat rising from the foliage and the ground. Remove the covers in the morning, once the frost has thawed, to let the light and fresh air back in, and to prevent overheating by the sun.
- For smaller individual plants you can use glass jars, milk jugs with the bottom removed, paper cups upside down flower pots as heat traps. Don't forget to remove these covers in the morning.
- You can collect heat during the day by painting plastic milk jugs black and filling them with water. Place them around your plants where they will collect heat during the day. Water loses heat more slowly than either soil or air. This collected heat will radiate out throughout the night.
- Potted plants are particularly susceptible to frosts because the roots are also unprotected. If you are unable to move your container plants indoors or under cover remember to also wrap the pot in burlap or bubble wrap, or simply bury the pot in soil in addition to protecting the foliage.
If your efforts were too late, or too little to protect your plants from a frost resist the urge to cut off the damaged parts of the plants. To a certain extent, these dead leaves and stems will provide limited insulation from further frost damage. You will have to go back and re prune your plants in spring anyway.
Tuesday, April 15, 2008
Dirt and Poop
I promised Doug I wouldn't swear (on the podcast as well as on my blog), however if you listened to this weeks show, you most likely noticed that I was bleeped out once. All I can think of when I say or write "poop" is a scene from Billy Madison...if you've seen it you know the line: "He called the S#*t Poop!"
Anyways, I promised to add some pre-planting information on soil preparation to the blog. As I said, step one is definitely to test your soil. I was in Agway (which is a garden supply store) today and they had test kits ranging in price from $4.99 to $24.99. While there I purchased this years supply of garden soil and composting cow manure. (Stay away from the chicken compost/manure...I've heard it is too acidic.)
Once you test your soil, that will determine your need for amendments. Following is a list of soil amendments and their affect on your dirt. Remember, you are looking for a pH range from 6 to 7.5.
By the way...All of these can be bought at a garden supply store and you should simply follow the instructions on the bag! If you are adding amendments to the soil, the best time to do it is in the fall. That gives sufficient time for them to break down. The reason why we are so worried about the soil is that the direct effect of poor soil will be a poor yield. Hops vines are cool, but really, we're not growing these things for aesthetics, we need the cones for our beer!
Anyways, I promised to add some pre-planting information on soil preparation to the blog. As I said, step one is definitely to test your soil. I was in Agway (which is a garden supply store) today and they had test kits ranging in price from $4.99 to $24.99. While there I purchased this years supply of garden soil and composting cow manure. (Stay away from the chicken compost/manure...I've heard it is too acidic.)
Once you test your soil, that will determine your need for amendments. Following is a list of soil amendments and their affect on your dirt. Remember, you are looking for a pH range from 6 to 7.5.
- Compost - slowly lowers pH of alkaline soil and raises pH of acidic soils and supplies plant nutrients. (You really can't go wrong composting and I am a firm believer that you should ALWAYS mix compost/cow manure in your garden beds.) Also, if you would like an easy way to live a little "greener" make your own compost pile/bin and compost your waste. You can help the environment and your garden at the same time.
- Bonemeal - Raises pH and is an excellent source of phosphorus.
- Sulfur - Lowers pH of alkaline soil.
- Wood ashes - Raises pH and contributes many nutrients.
- Limestone (Dolomite or Calcitic) - Raises pH of soil. Dolomite will add magnesium, calcitic will not.
- Phosphate - Slowly raises pH. Excellent source of phosphorous and other nutrients
By the way...All of these can be bought at a garden supply store and you should simply follow the instructions on the bag! If you are adding amendments to the soil, the best time to do it is in the fall. That gives sufficient time for them to break down. The reason why we are so worried about the soil is that the direct effect of poor soil will be a poor yield. Hops vines are cool, but really, we're not growing these things for aesthetics, we need the cones for our beer!
Monday, April 14, 2008
More Rhizomes!
More Rhizomes have arrived! The aforementioned Brewer's Gold Hops Rhizomes (which were ordered by Doug "accidentally on purpose" have arrived as well. It is still a little early for planting in Connecticut, so I have stored them with my Cascade Rhizomes in the butter tray of my fridge.
Hopefully you listened to this weeks podcast...if you have, you know I promised soil preparation details. They will be coming very soon as I plan on "working" my garden beds this week.
Hopefully you listened to this weeks podcast...if you have, you know I promised soil preparation details. They will be coming very soon as I plan on "working" my garden beds this week.
Tuesday, April 8, 2008
Rhizomes are here!

It's an exciting night! The Cascade Hops Rhizomes have arrived from Northern Brewer. The hops actually came from Freshops in Philomath, Oregon.
Many times plants, rhizomes, etc...will ship before you may be able to plant in your region. Remember you MUST wait until after the last possible frost. In Connecticut, I usually wait until the 2nd or 3rd week of May. There are a couple of options you have to wait out that difficult time between when you receive your Hops Rhizomes and when you can plant them.
- If you happen to have a Greenhouse, Garden Window, etc...you could start the rhizomes and transfer them when the ground thaws.
- The safest bet is to store the rhizomes in a plastic bag, slightly moistened and keep them in a refrigerator until you are ready to plant. (This is what I am doing)

Getting Closer...
It is finally starting to warm up in Connecticut...and the timing couldn't be better. One of those "teacher" perks, I am on spring break next week. Could you imagine? I have Spring Break and Summer Vacation for the rest of my life...I know you're jealous.
Anyways, Doug and I will be discussing soil preparation on the Home Brewing Perspectives Podcast shortly. Personally, I plan on starting the preparation of my site this week. That consists of building the trellis and getting the soil ready. Keep your eyes peeled, I will have site photos on the blog shortly, followed by detailed construction diagrams.
Anyways, Doug and I will be discussing soil preparation on the Home Brewing Perspectives Podcast shortly. Personally, I plan on starting the preparation of my site this week. That consists of building the trellis and getting the soil ready. Keep your eyes peeled, I will have site photos on the blog shortly, followed by detailed construction diagrams.
Thursday, April 3, 2008
Hops Structure Diagram
The first work-through of my hops structure. It is important to remember to properly plan for the best location BEFORE building your trellis.
Some things to keep in mind when choosing your location:

Some things to keep in mind when choosing your location:
- Southern Exposure with Full Sun (6-8 Hours)
- An Existing Wind Break to Prevent Vine Damage
- Plenty of Vertical Space
- Good Drainage

Hops Growing Structure
Ok, I know I'm a little late...I promised on the Home Brewing Perspectives Podcast the other day that I would post structural diagrams of the "trellis" system I'm growing my hops on. The structure will be a "straight pole" trellis system. 2 large posts spaced apart with a wire "web" between the posts. The wires will be attached to the posts through eyelet or hooks. The poles will be spaced about 20 ft. apart. That will leave plenty of room for the 6 rhizomes I ordered. I plan on having my poles be about 10 ft. high (and set 2-3 ft. in the ground). This will give the structure substantial support as well as being tall enough to allow growth, while still low enough that I can harvest the hop cones without much of a problem. Remember, I plan on training the hops horizontally before vertically.
Diagrams of the structure soon to follow...
Diagrams of the structure soon to follow...
Subscribe to:
Posts (Atom)